Getting your dimensions spot-on is the ultimate win on a busy shop floor where hitting your marks is the only way to stay ahead. Whether your team is building parts for massive jets or tiny medical gear, having the right gear is what keeps your production line moving.
If you want to make your workflow smoother and your results more reliable, it is time to ask: what is an optical comparator and how will it help your crew? From where we stand, these machines are the real secret to a quality-check routine that stays fast and totally stress-free.
Key Takeaways
- Touch-Free Precision: Optical comparators use bright light and magnifying lenses to measure parts without ever making physical contact, keeping delicate materials completely safe from squishing or scratching.
- Incredible Accuracy: When properly calibrated, these systems can hit positioning accuracies around 0.005 mm to make sure your parts perfectly match their blueprints.
- Two Main Configurations: You can choose between Horizontal setups for heavy, tube-shaped parts and Vertical setups for flat, flexible pieces like rubber gaskets.
- Built for the Shop Floor: Unlike glitchy digital camera setups, comparators offer a rock-solid, straightforward way to check complex 2D shapes in messy factory environments.
What is an Optical Comparator?
First things first, let's tackle the fundamental question: what is an optical comparator?
Sometimes folks in the industry call them profile projectors or even shadowgraphs, but whatever name you use, it is basically an optical measuring instrument that projects a magnified shadow image of a part onto a screen so its dimensions, angles, and profiles can be measured or compared with a template.
It works by throwing a giant, blown-up silhouette (similar to a high-precision shadow puppet) of a tiny part onto a big glass viewing window. Then, a quality pro can check the sizes of that massive shadow against a clear plastic overlay, a grid, or just look at the digital numbers on the screen.
Because the part gets scaled up, often 10x, 20x, or even 100x larger than it really is, spotting teeny-tiny mistakes or weird wobbles in the shape becomes a total breeze for your team.
The Primary Function of Optical Comparator Equipment
The big, main function of optical comparator gear is to give you a lightning-fast way to check 2D sizes on tricky shapes without ever having to physically touch the part. That "no-touching" rule is exactly why these machines are such a massive win for your production line.
We are going to go out on a limb and say the absolute best thing about these systems is how they can handle just about any material.
Old-school tools like those handheld metal squeezers or sliding rulers can easily squish soft stuff, such as rubber gaskets or plastic bits, or leave nasty scratches on shiny surfaces. By using a beam of light instead of a physical grab, a comparator gets the job done without leaving a single mark.
Think about trying to measure a bouncy silicone O-ring with a heavy set of metal calipers; you are going to squish the rubber and get a totally useless number every single time. With a light beam doing the heavy lifting, that O-ring stays perfectly round and completely untouched.
Plus, these machines are great for checking weird shapes that would be a total nightmare to measure by hand. Beyond direct measurement, a major function is comparison, where you overlay the projected image with a large-scale drawing to quickly judge if a part is within the required profile tolerance.
Key Characteristics of Optical Comparator Systems
When you are out shopping for new measurement gear, getting a grip on the physical characteristics of optical comparator setups is the only way to make sure you are picking a winner for your facility.
High-quality systems generally share several defining features:
- Crystal-Clear Lens Sets: They come with swappable lenses and telecentric optics that provide a sharp-as-a-tack, totally straight image across the whole viewing window.
- Two Ways to Light It Up: They usually give you two types of lamps. One shines from behind to give you a crisp black shadow, while the other shines from the front so you can see what is happening inside holes or on the surface.
- Heavy-Duty Metal Tables: To make sure your numbers hit the mark every time, the table where you put your part is built like a tank so it doesn't shake or wiggle. We like to think of a steady table as the actual "spine" of the whole operation.
- Exceptional Accuracy: When properly calibrated, these machines can reach magnification deviation uncertainties of approximately 0.01% and positioning uncertainties around 0.005 mm over a 100 mm range.
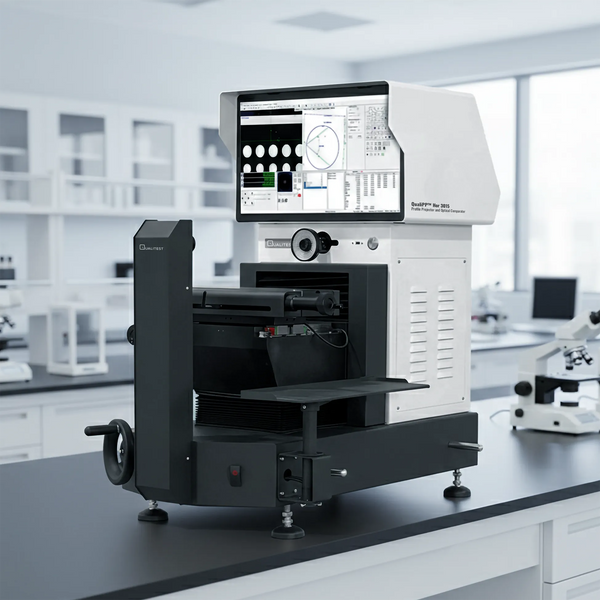
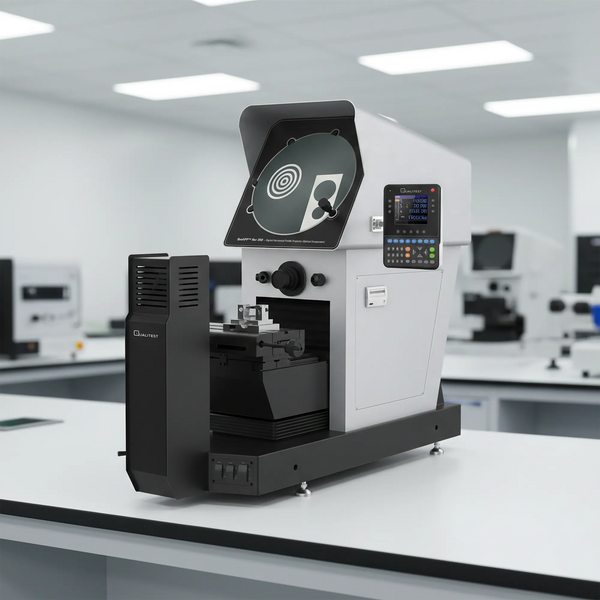
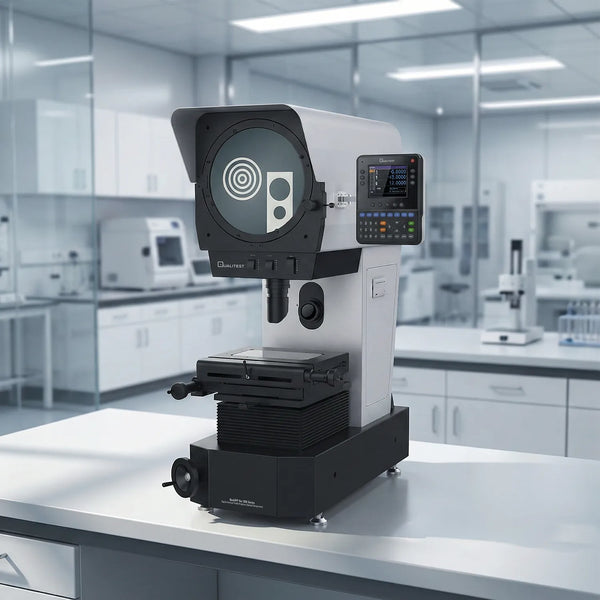
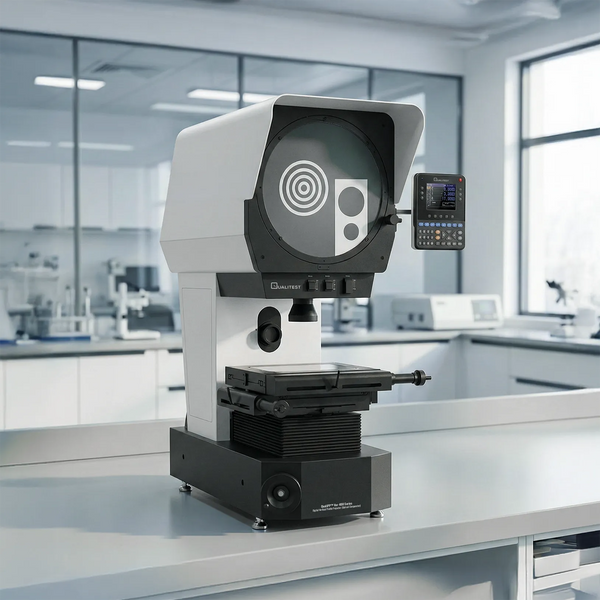
- Bright Digital Readouts: Modern ones, like our Digital Horizontal Profile Projector / Optical Comparator – QualiPP™ H3015, have easy-to-read displays that do all the math for you, figuring out angles and curves based on how you move the table.
Types of Optical Comparators: Horizontal vs. Vertical
When you are looking to buy, you are usually going to see two main setups: Horizontal and Vertical.
Horizontal machines like our QualiPP™ H350 or H412 are built for heavy, tube-shaped parts, like a 10-pound steel shaft, that need to be held up by blocks.
For flat, lighter pieces like rubber seals or metal gaskets, a Vertical setup like our QualiPP™ V300 Series is the way to go.
Let's look at the physical facts: if you are trying to measure a heavy steel transmission shaft, you need a Horizontal setup to hold that weight up straight. But if you are checking a flat gasket, you want a Vertical setup where it can just sit flat on the glass.
Specific Industry Applications
Because they can do so much, these machines are the heavy hitters in all sorts of high-pressure jobs:
- Car Parts: Checking the tricky teeth on gears and the spinning rods in engines.
- Medical Gear: Making sure tiny bone screws and heart-start gadgets are exactly the right size down to the hair-width.
- Planes and Space: Verifying that the big bolts and engine blades are safe enough to fly. For instance, checking the exact curve of a jet turbine blade where being off by just a fraction of a millimeter could cause a total engine breakdown.
- Tech and Circuit Boards: Making absolutely sure that the microscopic metal pins on computer chips and tiny wire connectors line up flawlessly.
- Heavy-Duty Cutting Tools: Looking over the exact angles and sharp edges of custom drill bits to make sure they slice through steel without making a mess.
- Defense Hardware: Checking the critical interior shapes of firing pins and trigger parts where a single sizing error is out of the question.
- Plastic Bits: Looking at the cross-cuts of plastic tubes to make sure they fit perfectly. This is a perfect scenario for the Vertical Profile Projector (Optical Comparator) – QualiPP™ V400 Series.
Optical Comparator vs. Vision Systems
A question we get all the time is whether to grab an optical comparator or one of those digital camera systems.
While digital vision systems offer automated 3D tricks, we still see folks reaching for optical comparators because they are tough as nails. It is important to remember that comparators are primarily 2D tools, which makes them very good for edges and diameters but limited for capturing full 3D geometry.
We are calling it: sometimes the rock-solid, straightforward way of doing things is just better than dealing with glitchy software when you are in a rush.
How to Use Optical Comparator Devices
If you are wondering how to use optical comparator tools, let's say you need to check the exact spacing on the threads of a custom aircraft bolt. Here is the basic play-by-play:
1. Set Up and Calibrate
Start by selecting your magnification (like 10x). Before you start the real work, it is standard practice to verify the magnification and scale using a calibrated artifact to keep your uncertainty within limits.
2. Mount the Workpiece
Clamp your custom bolt down tight on the work table using a vise or V-block. You want to make sure it is lined up perfectly straight with the optical axis so the shadow does not get distorted.
3. Pick Your Lights and Focus
Flip the switch for the light you need. Use the "backlight" for a hard black shadow or the "front light" to see surface textures. Twist the focus knob until the image on the glass screen looks totally crisp and clear.
4. Line It Up and Reset
Move the table until a specific spot on your shadow hits the center of the crosshairs. Hit the "zero" button on your digital display so the machine knows exactly where it is starting from.
5. Start Measuring
Smoothly turn the dials to move the table until the crosshairs land on the next spot you want to check. The digital screen will track the movement and tell you exactly how far you moved across the X or Y axis.
Maintenance & Calibration Tips
To keep your machine running smooth and staying accurate, we suggest sticking to these basic upkeep moves:
- Keep the Glass Sparkling: Dust or oily fingerprints on the lenses can make your image look like a blurry mess.
- Keep the Table Moving: Clean off the work stage and give the moving parts a tiny bit of grease so they don't get stuck.
- Get a Yearly Check-up: We are big believers in having a pro come by once a year. Regular recalibration is the only way to keep your positioning uncertainty within that 0.005 mm range.
Upgrade Your Quality Lab with Qualitest
At Qualitest, we believe top-tier quality should not be a massive financial weight. As a premier North American supplier, we provide factory floors with measurement gear that works hard without draining your bank account.
Whether you need a compact desktop unit or a floor-standing beast for massive aerospace parts, we have the budget-friendly, super-accurate solution for you. Stop guessing and start getting those measurements dead-on today.
Explore our full lineup of optical comparators and profile projectors right now and get your parts looking like sheer perfection.
References:
- Butler, C., & Duggan, R. (1989). Automatic Inspection Of Components Using Profile Projection. SPIE proceedings, 1010.
- Chen, Y. (2016). Uncertainty Evaluation of Profile Projector Calibration. NCSL International Workshop & Symposium Conference Proceedings 2016.
- Health, B., et al. (2025). Optical measurement methods of the 3D-position stability of implant-abutment connections - an in vitro study. BMC Oral Health, 25.