Ready to turn your daily measurement grind into a fast, winning streak for your shop?
Picking the right inspection gear is a major move that sets the pace for how spot-on your checks go. These profile projectors are the backbone of any top-tier room because they let you verify your work without even touching the parts.
At Qualitest, we’ve put together this look at the features, the perks, and our own take on the vertical vs horizontal optical comparator debate so you can grab the setup that fits your workflow like a glove.
Key Takeaways
- Gravity helps with flat parts: Vertical setups let you plop lightweight, flat, or squishy parts right on the glass without messing with clamps.
- Heavy metal needs heavy support: Horizontal setups give you the solid staging needed to lock down chunky, threaded, or round parts.
- Shape determines the machine: The way your part needs to sit to cast a clear shadow is the biggest factor in making the right choice between a vertical vs horizontal optical comparator.
- Digital upgrades pay off: Skipping the old plastic overlays and going with advanced measurement software speeds up your checks and cuts down on mistakes.
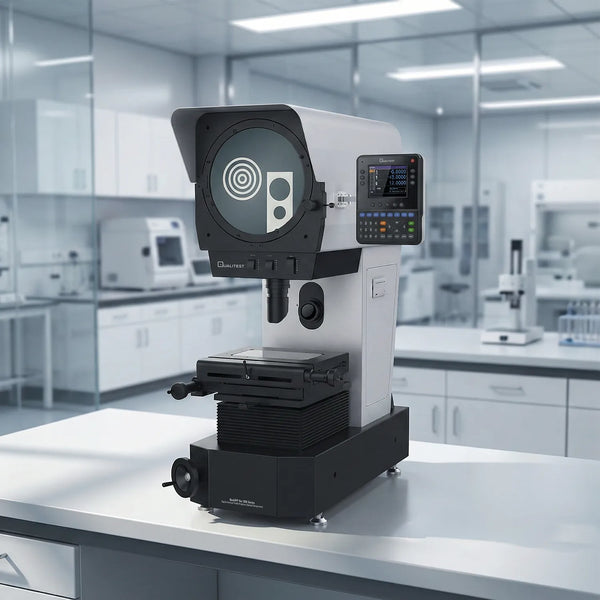
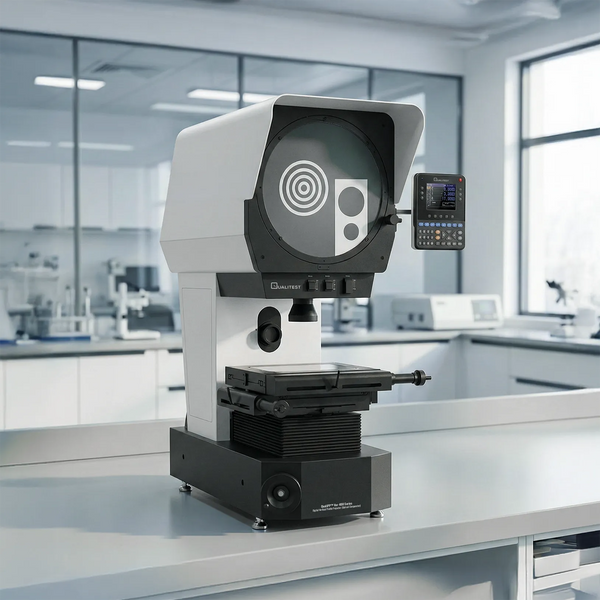
Vertical Configuration: Gravity-Assisted Staging
On a vertical machine, the beam of light zips straight up or down past the part and onto the screen. The best part about this look? The place where you put your parts is just a dead-flat, see-through surface of glass.
Best Times to Use It:
- Flat-as-a-pancake pieces (like stamped copper brackets)
- Squishy or bendy stuff (think of silicone O-rings that warp if you squeeze them)
- Thinner bits of plastic or tiny electronic parts (such as microchip lead frames)
- Stuff that doesn't weigh a ton
The Real Perk:
In our book, gravity is the absolute MVP of this setup. You can just plop a flat or bendy part right on the glass, and it stays put without you having to mess around with clamps or tiny vises.
For shops churning out heaps of flat parts, the sheer "plop-and-measure" speed is a total win that usually doesn't get enough credit. We also find that vertical setups can be better at handling tricky surface details. Some research suggests that vertical techniques help fix issues like shadows or blocked views by using specific light patterns to reconstruct surface profiles quickly.
That’s exactly why setups like our QualiPP™ V400 Series are so incredibly popular for rapid, benchtop checks.
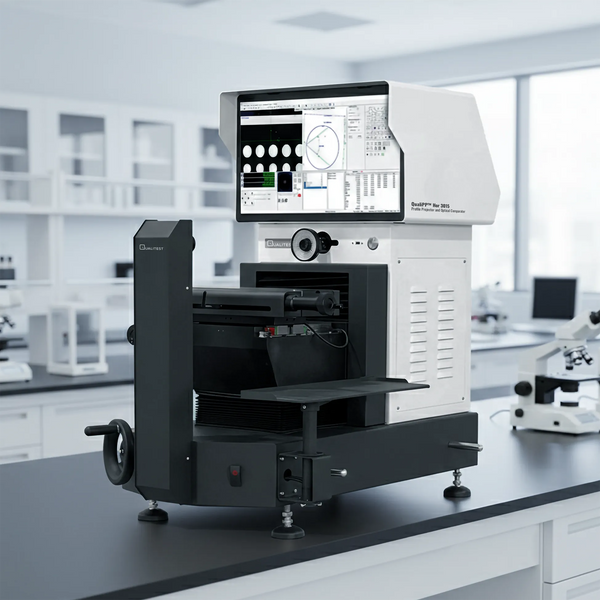
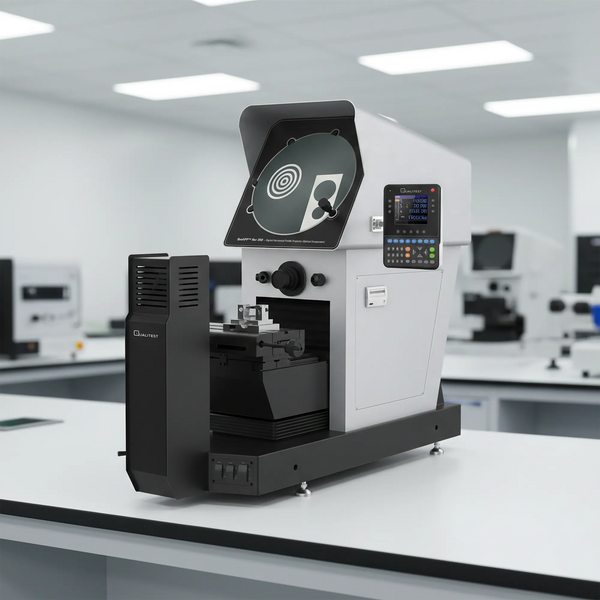
Horizontal Configuration: Heavy-Duty Inspection
On the flip side, these machines shoot a beam of light sideways across the staging area. Since the light is moving left-to-right, you have to actually hook your parts onto the table so the shadow hits the screen just right.
Best Times to Use It:
- Chunky, heavy-duty hunks of metal (like steel transmission gears)
- Long shafts, turned parts, and anything that looks like a cylinder (such as automotive camshafts)
- Screws and things with lots of threads (perfect for checking aerospace fastener pitch)
- Rough castings that have some serious weight to them
The Real Perk:
We look at the horizontal machine as the absolute workhorse of the machine shop. If you’ve got something big or a weird shape, you can lock it down tight with V-blocks or centers.
From where we stand, this setup has a level of "built-to-last" toughness that you absolutely need when you’re checking out parts that have a lot of mass. For instance, the thick staging on our QualiPP™ H350 is made specifically to handle that kind of daily abuse.
Quick Comparison: Vertical vs Horizontal Optical Comparator
If you’re in a rush and just want the highlights on how these two stack up, check out this side-by-side breakdown:
| Feature | Vertical Setup | Horizontal Setup |
|---|---|---|
| Path of Light | Straight Up or Down | Sideways / Left-to-Right |
| Holding the Part | Flat on glass; gravity holds it | Clamped with vises or V-blocks |
| Best Part Shapes | Flat, thin, or 2D stuff | Round, chunky, or threaded stuff |
| Weight Capacity | Lighter (don't break the glass!) | Much heavier (supported by thick metal staging) |
| Footprint | Smaller; fits on a desk easily | Bigger; needs some elbow room |
Primary Vertical vs Horizontal Optical Comparator Selection Factors
To really settle the vertical vs horizontal optical comparator debate for your team, we think you should look at these three big points:
Part Geometry and Staging Requirements
We tell everyone that the shape of your part should be the main thing steering your ship.
Think about it: How are we going to hold this thing? If your parts are thin or might get squished if you clamp them, you definitely want the vertical vibe. But if you’re looking at bolts or shafts that need to spin, a horizontal setup with centers is the only way to go.
Think about trying to measure the teeth on a heavy, wobbly gear. Trying to balance that on a delicate piece of flat glass is a total nightmare. Locking it into a V-block on a sideways-shooting machine makes the job a breeze.
Weight Capacity
How heavy your parts are is a massive deal here.
Those vertical glass tables are a bit finicky and have limits so you don't crack the glass. Placing a five-pound chunk of milled steel onto a fragile glass screen is just asking for a massive repair bill.
We feel that for anything weighing more than a couple of pounds, the safety of a solid metal horizontal stage is a much better bet than trying to squeeze it onto a vertical unit.
Workspace and Ergonomics
Usually, the vertical machines stay out of the way and don't hog your desk space. That said, it is clear that the horizontal ones (even if they are a bit bigger) are often way easier on the person doing the work when they have to swap out heavy fixtures all day long.
Industry-Specific Applications
Looking at what other shops in your field are doing is a great way to find the right path when choosing a vertical vs horizontal optical comparator:
Medical Gear & Electronics Manufacturing
Vertical is the top dog here. Checking out tiny stents or flexible seals works best when you can just lay them flat without any pressure messing with their shape.
Consider a facility measuring the outer diameter of a pliable medical tube. Trying to clamp that tube horizontally will pinch it, giving a totally false reading. Laying it flat on a vertical stage solves the problem instantly.
For high-volume repeatable checks of 2D outlines and hole patterns, these setups are unbeatable.
Plastics & Injection Molding
We see plastics facilities grabbing vertical machines constantly.
When you pull a fresh, thin-walled plastic part out of the mold, you want to check the dimensions fast. Laying it flat on the glass means you get accurate contour measurement of soft elastomers without clamping down and warping the flimsy plastic.
Automotive, Aerospace, & Machining
Horizontal is the heart and soul of these shops. Picture checking the complex threads on a heavy turbine bolt.
You need to hold that bolt perfectly steady between two centers and rotate it to check every angle. The horizontal setup is built exactly for that heavy-duty clamping.
Tool & Die Making
If your team is cutting custom dies or extrusion profiles, the horizontal setup is your absolute best bet. You are dealing with heavy blocks of hardened steel that require serious support.
You need to lock those dies in tight to verify the precise cutting angles, and a sideways-shooting machine gives you the solid staging needed to hold those massive chunks of metal perfectly still.
Operational Examples
To really put this all into perspective, let's look at two totally different shop floors and how they view the vertical vs horizontal optical comparator choice.
Shop A: The High-Speed Stamper
This facility punches out thousands of thin, flat copper connectors every day. They need to check angles and hole placements fast. Because the parts are flat and light, a Vertical setup lets their team just drop the part on the glass, check the screen, and swap it out in seconds.
A unit like our Vertical Profile Projector & Optical Comparator – QualiPP™ V300 Series fits this high-speed workflow perfectly. No vises, no wasted time.
Shop B: The Heavy Machining Crew
This team cuts thick steel shafts and heavy threaded rods. Their parts are round and weigh a few pounds each. If they bought a vertical machine, those parts would roll right off the glass.
By grabbing a Horizontal setup, like our QualiPP™ H3015 or the QualiPP™ H412, they can lock those shafts into staging centers, keeping everything safe, secure, and perfectly aligned for the light beam.
Optical and Digital Feature Requirements
Picking the direction of the light in the vertical vs horizontal optical comparator decision is just the first move. We believe that a modern machine has to have the smart features to actually make your life easier.
Illumination and Magnification
Having the right lighting and lenses is a big deal. We’re big fans of HD imaging chains featuring detented zoom lenses that deliver repeatable magnification without distortion.
Additionally, lighting makes a massive difference. You want programmable, multi-zone lighting—like our software-controlled 4-ring, 8-division LED surface lighting paired with parallel contour lighting—to give you perfect edge contrast even on highly reflective materials.
Measurement Software and Data
The days of relying solely on manual overlays and operator eyesight are fading.
Most profile projectors used to be strictly manual, but big leaps in tech now allow for automatic checks of X and Y coordinates all the way around the profile. Today's top-tier machines bridge the gap between traditional optics and advanced video metrology.
We highly recommend setups running advanced programs like our iMeasuring software, which guarantees rapid, repeatable feature capture for edges, radii, and hole locations. It gets rid of the guessing game and lets you save your data right away, which is an absolute must-have for any modern shop.
Financial Impact and ROI
At the end of the day, picking the right vertical vs horizontal optical comparator is all about getting the most bang for your buck over the long haul.
Calibration is the secret sauce here. Evaluations show that well-kept projectors have incredibly low errors in magnification and positioning, which keeps your measurements reliable.
We’ve calculated that getting the right setup cuts down the time you spend fiddling with parts, which keeps your labor costs down. Plus, we’re convinced that relying on powerful software and HD video imaging is the fastest way to stop making mistakes that lead to a pile of scrap metal.
By picking a machine that actually fits your parts, you dodge those sneaky bills that come from trying to force a machine to do something it wasn't built for.
Selecting the Optimal System
We think the answer is buried in what your shop actually makes every day.
- Go Vertical if your production focuses on flat, squishy, or light 2D parts and you want to move fast without fixtures.
- Go Horizontal if you're dealing with chunky, round, or heavy parts that need to be locked down tight.
Boost Measurement Accuracy with Qualitest
We know that picking the right setup for your lab is a big move. We firmly believe that top-shelf quality checks should stay within your budget, so we focus on providing solutions that are satisfyingly spot on for your needs.
Check out our full pile of cost-effective gear on our Optical Comparator / Profile Projector page and let us help you find the right fit today.
References:
- Ai, J., Zhang, Q., & Su, X. (2025). Fast modulation measurement profilometry based on phase-shifting and modulation ratio. Optics express, 33(10), 21707-21718.
- Butler, C., & Duggan, R. (1989). Automatic Inspection Of Components Using Profile Projection. SPIE Proceedings, 1010.
- Chen, Y. (2016). Uncertainty Evaluation of Profile Projector Calibration. NCSL International Workshop & Symposium Conference Proceedings 2016.